Any cook who cuts and chops meat regularly will have a meat cleaver in their kitchen.
Then again, like every other knife, it also loses its sharpness over time, which is why it is important to know how to sharpen a meat cleaver.
The best way to do this is by using a whetstone, but there are different tools you can use too.
Before we talk about that, do you know why you need to sharpen your meat cleaver in the first place?
Why Should You Sharpen Your Meat Cleaver?
Unlike other knives, meat cleavers can get a bit pricier.
It’s understandable, though, as they often use high-quality steel to be able to chop through bones.
Because they cost more, they are not the type of knife you will want to replace with a new one every time they get dull.
What’s more, using a dull meat cleaver will completely ruin the meat you are chopping.
In most cases, it will result in uneven cuts and small bits and pieces of bones.
While you can get it professionally sharpened, those who don’t want to pay for that can learn how to do it at home.
How To Sharpen a Meat Cleaver
There are different techniques you can follow when sharpening a meat cleaver.
However, the best one will depend on the type of cleaver you have and how you use it.
Below are some of the popular techniques to sharpen a meat cleaver:
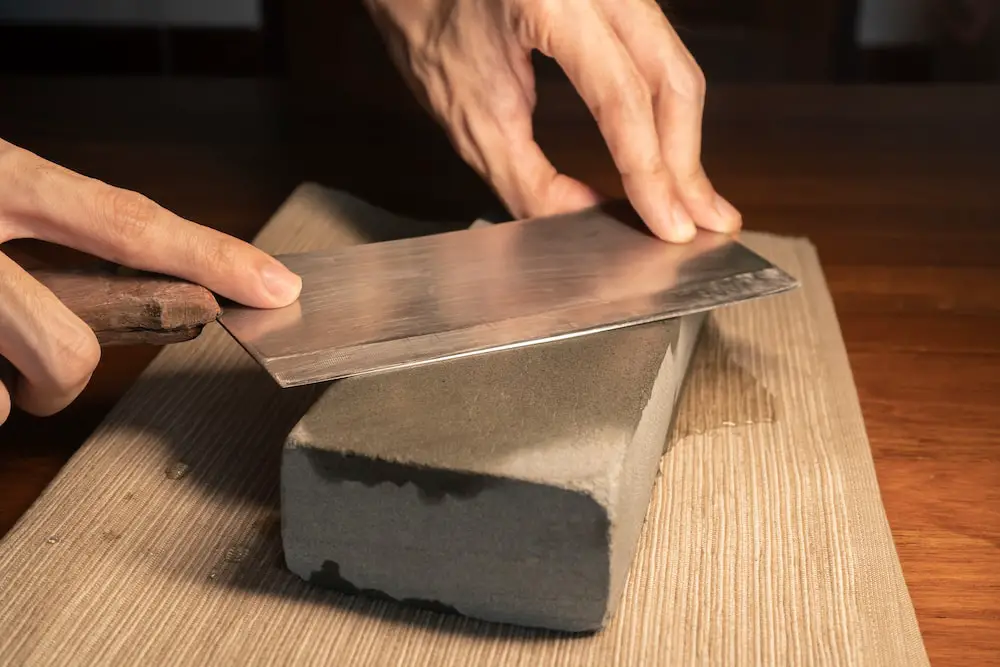
Using a Whetstone
When it comes to sharpening a meat cleaver, the most popular method is using a whetstone.
It is the best sharpening method for used or older blades.
Whetstones come in different grit sizes. The higher the number is, the better will it be able to sharpen your blade.
This technique may seem easy to do, but it needs a lot of practice to do it perfectly.
As such, you will need to exercise caution so as not to damage the cleaver.
To use a whetstone, you simply need to follow the process below.
Step 1: Profiling
Begin by deciding whether your cleaver requires profiling. This is when you are giving the edge an overall shaping first.
Typically, this is done for older edge-damaged or dull cleavers.
The technique remains the same but at a much shallower 22.5-degree angle, giving it a better shape and removing any burs.
Step 2: Wet the Stone
It’s important that you wet the whetstone before the sharpening process, as a dry whetstone will not work the same.
Step 3: Angle the Blade
Hold the cleaver’s handle in your dominant hand and place its top end on the stone at a 30-degree angle.
Step 4: Follow the Correct Strokes
You will need to make two strokes—one on one side and another on the other side.
Continue doing this throughout the sharpening process.
Step 5: Pull the Blade Towards You
Pull the backside of the cleaver towards you, with the blade facing outward to prevent any injury.
Note that the blade’s edge has to move along the whetstone as you work.
This way, you are getting the entire edge with every stroke you make.

Step 6: Flip to the Other Side
When flipping to the other side, you’ll have to push it away from you.
Make sure the opposite side of the cleaver is down on the whetstone to ensure that you sharpen both sides evenly.
Again, make sure you put water on the whetstone constantly. It works best when it is wet.
Step 7: Focus on the Right Angle
Pay close attention to the angles. If it’s too steep, it can end up ruining your blade.
On the other hand, if it’s too shallow, it can result in an unsharpened blade or a keen edge that’s frail and thin.
Step 8: Wipe
You might notice small particles of the blade and grit from the stone still stuck to the cleaver.
Therefore, it’s important that you wipe down the freshly sharpened cleaver before using it.
Using an Electric Grinder
Sharpening with an electric grinder does not really need practice, making it a great technique for home chefs.
An electric grinding machine will typically have one or more spaces to accommodate different types of knives.
The machine also comes at a pre-fixed angle, so you don’t need to worry about that either.
As you can imagine, it’s safe to assume that this technique is almost effortless to do.
The problem is, it has a drawback—it shortens the cleaver’s lifespan.
Using a Clamp
If you are using a Western meat cleaver, you can choose to sharpen it with a clamp.
This kind of cleaver comes with a heavier knife edge that’s not very piercing.
It is mainly for rough use, such as cutting through large chunks of meat and bones.
Therefore, you’ll find that this knife does not work well on vegetables or if you are aiming for delicate cuts.
Because the edge does not have to be piercing, you can sharpen the knife easily.
Plus, it does not require a specific style of sharpening like other cleavers.
To sharpen your cleaver following this technique, check out these steps.
Step 1: Position the Knife
Start by putting the edge of the cleaver in the clamp. Place it in such a manner that it touches the first nail.
Choose the medium hone, which is at a 30-degree angle.
Step 2: Start Sharpening
Once it’s in the correct position, run it toward the clamp in a sweeping motion.
Do this very carefully for five strokes.
Step 3: Repeat on the Other Side
Flip the knife and repeat the process on the other side of the cleaver.
Additional Meat Cleaver Care Tips
Along with sharpening the edge, you also have to take care of the cleaver’s blade and handle.
If it comes with a wooden handle, take the time out to oil it every now and then to prevent it from drying out and cracking.
Also, while cleavers are known to be dishwasher-friendly, we recommend hand washing it with a mild detergent instead.
Then, finish it off by immediately drying it using a dry towel or soft cloth before you store it away.
Mastering the Art of Sharpening Your Cleaver
With the help of this guide, we are certain that you now have a better understanding of how to sharpen a meat cleaver.
Dull meat cleavers will not only make cutting through meat and bones a difficult task; in worse cases, it can also cause injury.
Regardless of which technique you follow, make sure you do it correctly, not only for safety but also to prolong the knife’s lifespan.

